There is something incredibly satisfying about making butter from scratch. With just heavy cream and a few minutes of mixing, you get rich, fresh butter that tastes cleaner and more buttery than anything from the store. This homemade butter is especially perfect spread over warm homemade buttermilk pancakes, where it melts right in and really shines. It is a simple recipe, but one that feels a little special every time you make it.

Why Make Homemade Butter
Homemade butter gives you full control over flavor, texture, and salt level. You know exactly what goes into it, and there are no preservatives or stabilizers involved. The result is butter that tastes fresher and more vibrant, with a soft, spreadable texture when cold and a beautiful melt when warmed.
Salted Versus Unsalted Butter
Homemade butter offers flexibility and control. Leave out the salt and you get a clean, pure dairy flavor that works especially well for baking, where precise salt levels matter. Adding salt gives the butter a slightly longer refrigerator life and a more rounded, savory taste. Salted butter is ideal for spreading on toast, pancakes, biscuits, or warm homemade rustic bread. If you plan to use your butter mostly for everyday eating, lightly salting it is usually the better option.
Why Rinsing the Butter Matters
After the butter separates from the cream, rinsing it thoroughly is an important step that should not be skipped. Any buttermilk left behind can cause the butter to spoil faster. Washing the butter under cold water or in ice water removes those last traces and helps the butter stay fresh longer. You will know you are done rinsing when the water runs clear as you knead the butter. This step also helps firm up the butter and improves its final texture.

Storage and Make-Ahead Tips
Homemade butter keeps well in the refrigerator for about one week when stored in a tightly sealed container. For longer storage, it freezes very well. Shape it into logs or pack it into small containers, then freeze for several months.
What to Do With Leftover Buttermilk
Do not throw away the liquid left behind after making butter. While it is thinner than store-bought cultured buttermilk, it still works beautifully in many recipes. Use it in pancakes, biscuits, or cookies. If you are not ready to use it right away, store the buttermilk in the refrigerator for a few days and use it anywhere a mild buttermilk flavor makes sense.

Homemade Butter
Ingredients
- 2 cups heavy cream, cold
- 1/4 teaspoon kosher salt, optional
Instructions
- Pour the heavy cream into the bowl of a stand mixer fitted with the whisk attachment (or use a large mixing bowl with a hand mixer).
- Begin whipping the cream on medium speed until it thickens into whipped cream, about 3 to 4 minutes.
- Continue whipping past the whipped cream stage. The cream will begin to clump and separate into butter and buttermilk. This usually happens around 8 to 10 minutes in total.
- Once the butter and buttermilk fully separate, stop the mixer. Pour the contents through a fine mesh strainer or cheesecloth set over a medium bowl to catch the buttermilk. Save the buttermilk for baking if desired.
- Transfer the butter to a clean bowl and press it with a wooden spoon or silicone spatula to remove as much excess buttermilk as possible. This step is important; any leftover buttermilk can cause the butter to spoil quickly.
- Rinse the butter under cold running water or in a bowl of ice water, kneading it gently with your hands or spatula to wash out the last bits of buttermilk. Continue rinsing until the water runs clear.
- For salted butter, sprinkle kosher salt over the butter and knead it in evenly.
- Pack the butter into a clean jar or container with a tight lid. Store in the refrigerator for up to 1 week, or freeze for longer storage.
New Recipes
See More →
Bourbon Blackberry Pork Chops
Bourbon Blackberry Pork Chops with a sweet and savory glaze. Juicy, pan-seared pork finished in a rich berry sauce.
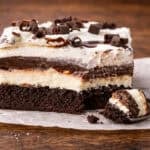
Chocolate Brownie Lush Dessert
Chocolate Brownie Lush Dessert with layers of brownie, cream cheese, pudding, and whipped topping. A rich, make-ahead dessert.

French Baguette
French Baguette with a crisp crust and chewy center. An easy homemade bread recipe with simple ingredients and long fermentation.