Corned Beef Hash is a simple, hearty mix of chopped corned beef, potatoes, and onions all fried together in butter until it is beautifully caramelized. It’s the ultimate comfort food, born from leftover corned beef (think post-St. Patrick’s Day magic), and worlds away from the mushy canned stuff. The savory, meaty aroma alone will pull everyone to the kitchen, and that first bite? Pure cozy bliss with every crispy, savory forkful. Serve it up with some rustic bread for a full home cooked meal!

The Secret to Crispy, Flavor-Packed Corned Beef Hash
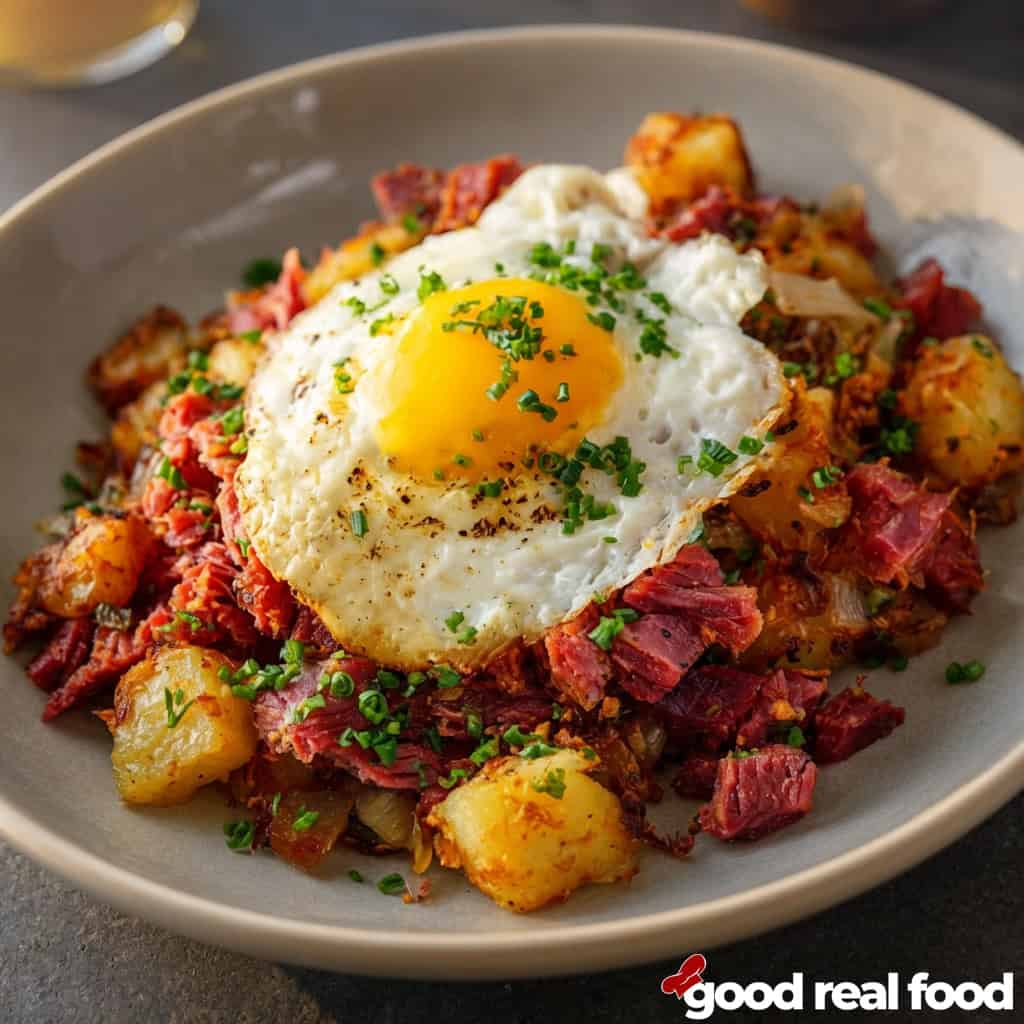
The key to standout easy corned beef hash lies in texture and seasoning. Start with Yukon gold potatoes for that creamy interior and golden crisp exterior, paired with butter-sautéed onions and garlic for deep flavor. Pressing the hash into an even layer in a hot skillet creates that irresistible browned crust everyone craves. A sprinkle of fresh parsley at the end adds brightness and makes it look restaurant-worthy.
Perfect Pairings and Serving Ideas for Corned Beef Hash
Corned beef hash with eggs is the ultimate classic, top your sizzling skillet with fried, scrambled, or sunny-side-up eggs for a complete meal. Serve alongside buttered bread, rye bread, or even sautéed greens for balance. This versatile dish works year-round but shines as a lefotver St. Patrick’s Day corned beef idea or cozy winter breakfast. For extra flair, add a dash of hot sauce or Worcestershire if you like a subtle kick. It’s hearty, satisfying, and always a crowd-pleaser.
How to Store and Reheat
One of the best things about homemade corned beef hash is how well it reheats. Store leftovers in an airtight container in the fridge for up to 3 to 4 days. For the crispiest results, reheat in a hot skillet over medium heat rather than the microwave; this revives those golden edges perfectly. It freezes beautifully for up to 2 months too; thaw overnight and crisp it up in the pan.

Corned Beef Hash
Ingredients
- 3 tablespoons unsalted butter
- 1½ pounds cooked corned beef, cut into ¼-inch cubes (about 4 cups)
- 4 large Yukon gold potatoes, rinsed, peeled, and cut into ½-inch cubes (about 4 cups)
- 1 large yellow onion, finely diced (about 1 cup)
- 1 teaspoon garlic, minced
- ½ teaspoon kosher salt
- ¼ teaspoon black pepper
- Fresh parsley, for garnish
Instructions
- Bring a large pot of water to a boil. Add the cubed potatoes and boil for 10 to 12 minutes, until just fork-tender but not falling apart (larger cubes may need the extra minute or two).
- Drain the potatoes well, pat them dry with paper towels, and set aside.
- In a large skillet over medium-high heat, melt the butter. Add the diced onion and cook for 3 to 4 minutes, stirring occasionally, until softened and translucent.
- Stir in the minced garlic and cook for 1 minute, or until fragrant. Season with the kosher salt and black pepper.
- Add the cubed corned beef and boiled potatoes to the skillet. Gently stir to combine, then lightly press the mixture down into an even layer.
- Cook undisturbed for 6 to 7 minutes, allowing the bottom to develop a nice golden-brown crust.
- Flip sections of the hash and continue cooking for 10 to 15 more minutes, turning occasionally with a spatula to brown evenly on all sides. (For maximum crispiness, resist stirring too often.)
- Remove from heat, garnish with chopped fresh parsley, and serve warm. Top with fried eggs and toast for the classic experience.
This recipe was inspired by iamhomesteader’s Corned Beef Hash
New Recipes!
See More →
Strawberry Shortcake
Fresh strawberry shortcake made with homemade strawberry sauce, fluffy whipped cream, and soft biscuits. Simple, classic, and delicious.

Baked Zucchini Sticks
Crispy Baked Zucchini Sticks with a crunchy panko and parmesan coating! A tasty, easy snack or side dish everyone will love.

Homemade Cheeseburger (One Pan!)
Classic homemade cheeseburgers with juicy seasoned beef, melted cheddar, and toasted buns. Easy skillet burgers ready in 20 minutes.
The corn beef – did you cook your corn beef and what recipe did you use?
Hi Anne – Yes, it was cooked, we used this recipe: https://iamhomesteader.com/corned-beef/
Delicious!